
Warp Zone - Set up an object for maximum warping

Getting the most control over your warps can be a puzzle if you haven’t figured out a good system to use every time. The good news is there is one, and it involves embedded smart objects so your warps are editable. The key to ultimate flexibility that many people miss though is the alignment step. I’ll show you how.
For this example let’s assume you’ve been asked to swap out a shoe on a shot of an athlete. You’ve shot a new shoe on model in studio and need to composite it into the athlete image. The first step is getting it into place. Even the most meticulous setups in studio to get the new shoe shot in the exact same position will be off by a bit. And often they’ll be off by a lot. Here’s how to set up the new shoe to easily warp in.
1. Open the shot and rough clip around the shape of the shoe.

2. Now duplicate the layer (Cmd + J), set the path as a selection, inverse the selection (Cmd + Shift + I), and hit Delete to knock out the shoe

3. Now for the alignment step.
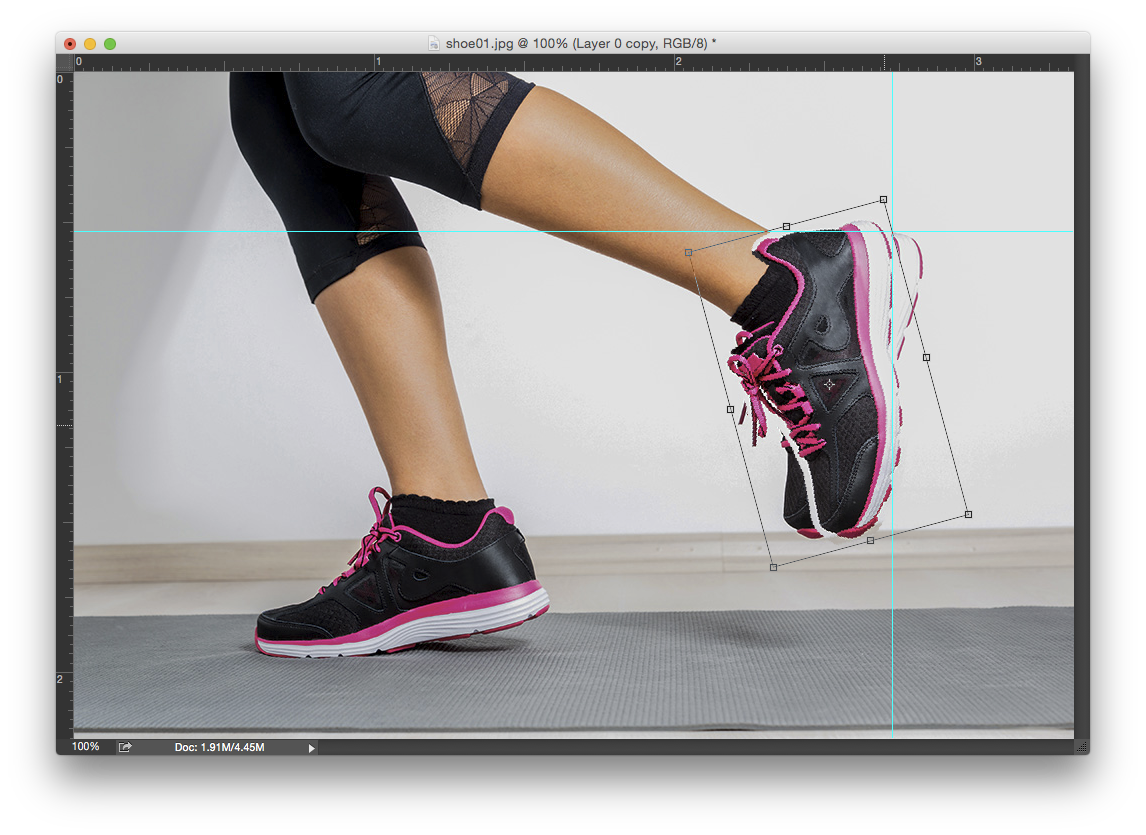
For a warp to be most effective, the bounding box for the warp should align with the shape of the object as closely as possible, meaning that you need to rotate the shoe to align as closely to a horizontal or vertical axis as possible.
Cmd + T to enter Transform mode, and rotate the shoe as shown below. I added some guides so I could see the axes better. Hit enter when you’re happy with the alignment.
4. Now convert your aligned shoe layer to a Smart Object so that all of your future warps will be editable. Right click on the layer, and select Convert To Smart Object in the drop down.

Now to demonstrate why we’re so concerned with aligning the object to an axis.
Below you can see the same shoe in 3 different positions in Warp mode. The shoe on the left is the one we’ve just prepped to be aligned, the other 2 are not. Notice how tightly the warp bounds and grid align to the shoe we’ve prepped, and how much looser it is around the other 2.

When I need to align the shoe onto the athlete shot, if I had to choose, it would be the one on the left every time. I know that I can control the toe, center, and heel of the shoe with much more precision than either of the other 2.
And since you’ve converted this to a Smart Object after it’s been aligned, you can go back into the Warp as many times as you like to adjust.

